How to Master Natural Light Photography
How to Master Natural Light Photography
Natural light photography is an art that requires an understanding of how light behaves at different times of the day and in various settings. Unlike artificial lighting, natural light is dynamic and can create stunning effects when used correctly. In this article, we will explore key techniques to help you master natural light photography.
1. Understand the Different Types of Natural Light
Natural light changes throughout the day and can dramatically affect your images. The main types of natural light include:
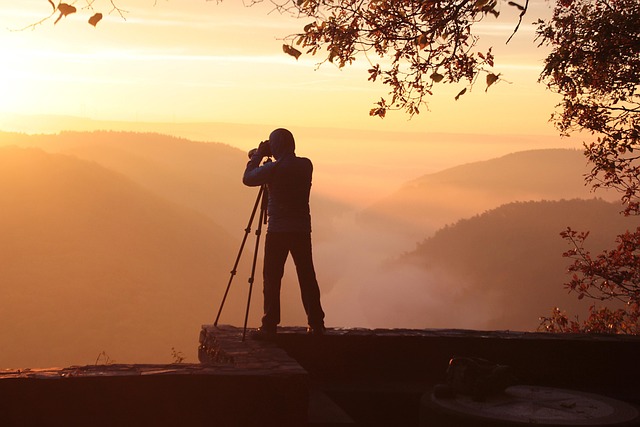
- Golden Hour: The soft, warm light just after sunrise and before sunset is ideal for portraits and landscapes.
- Midday Sun: The harsh light around noon creates strong shadows, which can be challenging but useful for dramatic effects.
- Overcast Light: Cloudy days provide diffused, even light that reduces harsh shadows and highlights.
- Blue Hour: The cool, bluish light before sunrise and after sunset adds a moody and dreamy effect.
2. Use the Golden Hour for Stunning Results
The golden hour is one of the best times for natural light photography because the sunlight is soft and warm. To make the most of it:
- Plan your shoots around sunrise and sunset.
- Position your subject so the light falls evenly on their face.
- Experiment with backlighting to create silhouettes and lens flares.
3. Learn to Work with Shadows and Highlights
Natural light often creates strong contrasts between bright and dark areas. To manage this effectively:
- Use reflectors to bounce light onto your subject and soften shadows.
- Adjust your camera settings to expose for highlights while maintaining detail in shadows.
- Position your subject strategically to avoid unflattering shadows.
4. Use Window Light for Indoor Photography
If you’re shooting indoors, window light can be your best friend. To get the best results:
- Position your subject near a window for soft, natural illumination.
- Use sheer curtains to diffuse harsh sunlight.
- Adjust your angles to control the intensity and direction of the light.
5. Understand the Direction of Light
The direction from which light hits your subject plays a crucial role in the final image:
- Front Lighting: Evenly lights the subject and minimizes shadows.
- Side Lighting: Adds depth and texture, ideal for dramatic portraits.
- Backlighting: Creates a glow around the subject but may require exposure adjustments.
- Top Lighting: Often harsh and unflattering; best avoided unless used creatively.
6. Adjust Your Camera Settings for Natural Light
To make the most of natural light, you need to adjust your camera settings accordingly:
- Use a low ISO (100-400) to reduce noise and maintain image quality.
- Adjust aperture (f/2.8 – f/8) depending on the depth of field you desire.
- Use shutter speed accordingly to balance exposure and motion blur.
7. Experiment with White Balance
Natural light varies in temperature, affecting the color tones of your photos. Use white balance settings to correct or enhance the lighting:
- Daylight (5200K): Best for sunny conditions.
- Cloudy (6000K): Warmer tones for overcast skies.
- Shade (7000K): Adds warmth in shaded areas.
- Custom White Balance: Adjust according to the scene for accuracy.
8. Use Natural Light to Enhance Portraits
When shooting portraits with natural light:
- Place the subject in soft, diffused light to avoid harsh shadows.
- Use reflectors to bounce light and add brightness to the face.
- Experiment with golden hour and backlighting for a magical effect.
9. Make the Most of Overcast Days
Cloudy days provide soft, even lighting that is perfect for portraits and macro photography. To maximize results:
- Increase exposure slightly to compensate for reduced light.
- Utilize the diffused light for evenly lit portraits.
- Experiment with colors, as overcast light enhances rich, natural tones.
10. Practice and Experiment Continuously
Natural light photography is all about observation and adaptation. Keep practicing and experimenting with different times of the day, angles, and light conditions. By understanding how light interacts with your subject, you can create stunning images that convey mood and emotion.
Conclusion
Mastering natural light photography takes time, patience, and creativity. By understanding different types of light, adjusting your camera settings, and experimenting with composition, you can make the most of available light and take breathtaking photos. Keep practicing and refining your techniques to become a skilled natural light photographer!

